Snappy fax's cover page designed is much improved over previous versions. The cover page templates are no longer dependent on the screen resolution you are using, the cover page templates are much easier to work with and produce a cover page with a much more pleasing appearance.
If you are a current snappy fax version 4 user, your default cover page will have already been converted to version 5 format, you will, however find that you may need to make some minor adjustments to position and size of text objects with the version 5 cover page designer. If you use more than one cover page template then you will need to import and convert your prior version templates using the cover page designer.
Note: version 4 and prior versions of snappy fax cover page template files have a file extension of .fcp, version 5 uses a file extension of .fct
You access the cover page designer by clicking the 'Cover Sheet Designer' button on the Tools & Accounts ribbon tab.
A cover page template is just that, a template. The template contains objects that represent things that will need to be populated onto the cover page at fax time but the value of which cannot be know at the time the cover page template is created. For example, the fax recipient's name. Obviously, you will want to use the same template over and over regardless of who you will be sending the fax to. The fax recipient object will be automatically populated with the recipient's name when the cover page is created. The same is true for other objects like the fax date and time, number of pages in the fax, etc.
Some sample cover page templates are supplied with snappy fax, you can use these as a starting point for designing your custom template or you can use them as is.
Logos
You can use the image tool to place a graphic of your company logo on the template. The graphic must be either a .bmp. Do not use color or grayscale graphics, if your logo graphic is not black and white, use an image editing tool to convert the image to black and white before placing on the template. Remember that faxes sent by Snappy Fax are black and white so observe these rules for your logo for best rendering results when the cover page is created.
Text objects
The text objects for fax date, time, recipient name and the like all contain a character between two tildes. For example for date it is ~D~ . The actual object's text is
Date: ~D~. The ~D~ will be replaced with the current date then the cover page is created at fax time. The same applies to the other objects. You can change the text part of the object by pressing F2 on the keyboard after selecting the object with the mouse. You should not change the ~D~ part (in this example). So, you could change Date: ~D~ to Current Date: ~D~, if you like. If the ~D~ is changed then the current date will be blank on the cover page created at fax time. When you exit or save your template, Snappy Fax will audit the template and alert you to these types of errors so that you can fix them before leaving the cover page designer.
Static text objects will always show the exact text that you enter into the object using F2 to edit the object. The term static means unchanging.
For example you might want to place a static text object and edit the text to show your street address. Snappy fax does not need to change this as it will always be the same.
In addition to pressing F2 to edit the text, you can right click on an object and select 'Edit Text' from the popup menu.
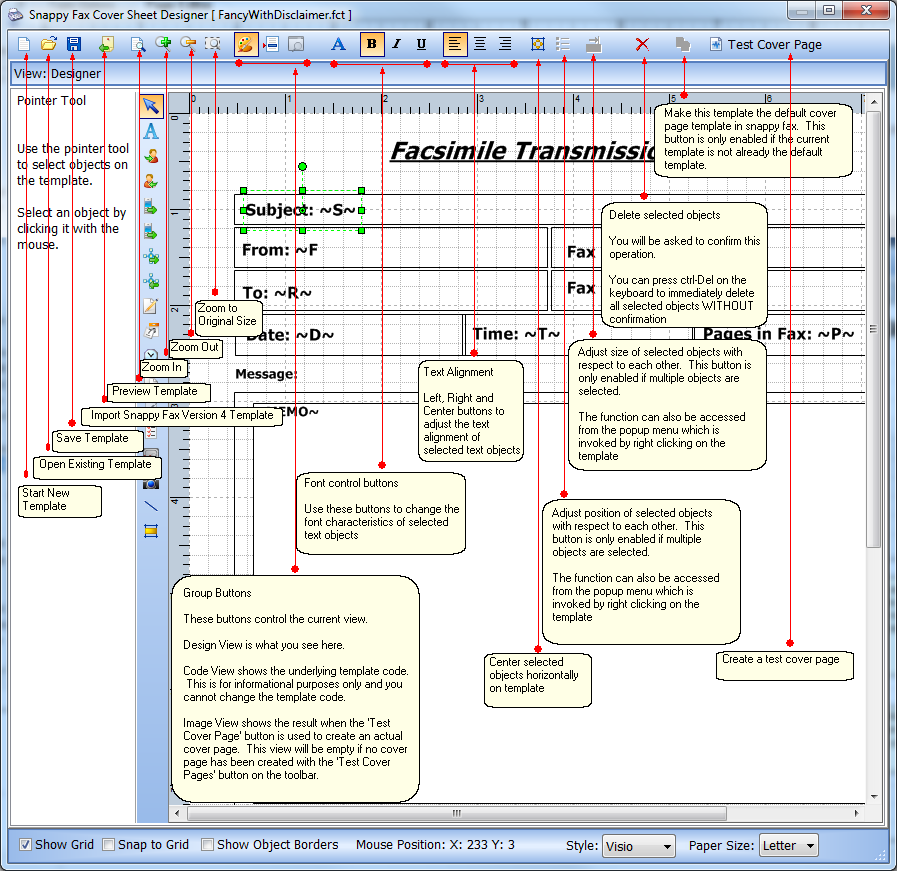
The cover page designer looks like this:
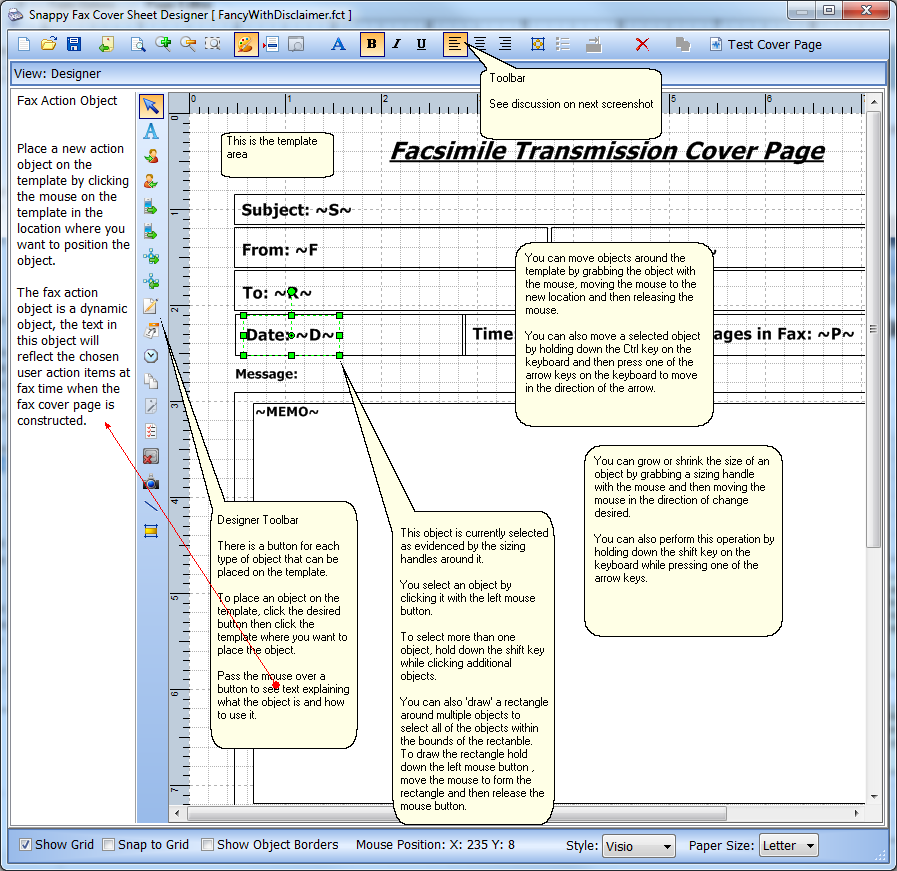
Toolbar Discussion