Configure your modems in this section:
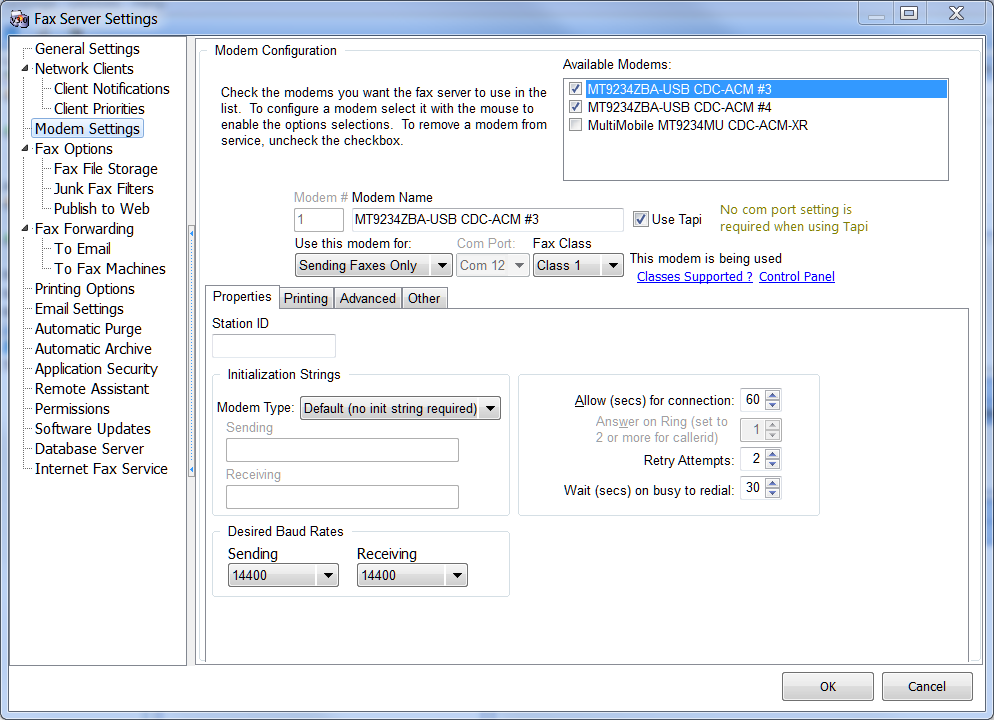
The modem settings page includes some general information and four tab pages (shown separately below).
All known modems connected to your computer will be shown in the Available modems list. Check the modems you want to use, the modems will be numbered starting with '1' in the order that you check them.
Use Tapi
Tapi is the "telephony application programming interface" included in the Windows operating system. If you choose this option, you do not need to select a Com port (see below) as Windows will take care of this for you. If you do not select Use Tapi, then you will need to select the com port since access to the modem will be direct to port and the fax server needs to know what port to use. You can consult control panel by clicking the 'Control Panel' link to see what com port the modem is installed on.
Use this modem for:
Select the way you want to use the modem, the available selections are Sending only, Receiving only or Sending and Receiving.
Com Port
If you have select Use Tapi then this item will be disabled as the port number will be discovered and managed by Tapi. If Use Tapi is not selected then select the proper com port from the drop down list.
Fax Class
The available fax classes are Detect, Class 1, Class 2, Class 2.0 and Class 2.1. Class 2.1 will not be included in the selection list unless you are using the SG3 edition of the fax server software. If you are unsure what classes your modem supports, select 'Detect' from the list. Most of the cheaper modems on the market support only class 1.
Properties Tab Page (shown above)
Station ID
This is the phone number of the phone line the modem is connected to.
Modem Type:
The modem type selection controls the initialization strings for sending and receiving. In most cases the 'Default (no init string required)' setting will do and that is the default. One notable exception is the US Robotics model 5637 modem, there is a modem type selection for it and the associated init string (AT&F1) will cause the hardware flow control stored profile to be used for that modem. Some other modems may need special init strings to enable hardware flow control which is essential in fax session control. If you have problems sending or receiving faxes, try changing the modem type or consult your modem manual for the correct init string which enables hardware flow control. To enter a custom init string(s) select the 'Custom' modem type
Desired Baud Rates
Select 14400 for the desired baud rates or if using Class 2.1, 33600 will be forced for this selection. Note that some modems may have difficulty receiving faxes from some machines at 14400. This is due to an improper implementation of V.17 to V.29 transition. If you have difficulty receiving from some fax machines, set the receiving baud rate to 9600.
Allow (secs) for connection:
This is the amount of time the modem will wait until it gives up on the remote fax answering a call. 60 seconds should be ample time for this selection, if the remote cannot answer and start emitting fax tones in 60 seconds the call is not likely to be answered at all.
Answer on Ring
This is the number of rings that must occur before the fax server tells the modem to answer a call. If you have callerid on your phone line, set this to 2 or higher. The callerid information is processed between the first and second ring on most phone systems.
Retry Attempts
This is the number of times the fax server will retry a fax transmission if it encounters a busy or no answer condition.
Wait (secs) on busy to redial
The amount of time to wait after a busy condition before redialing.
Printing Tab Page
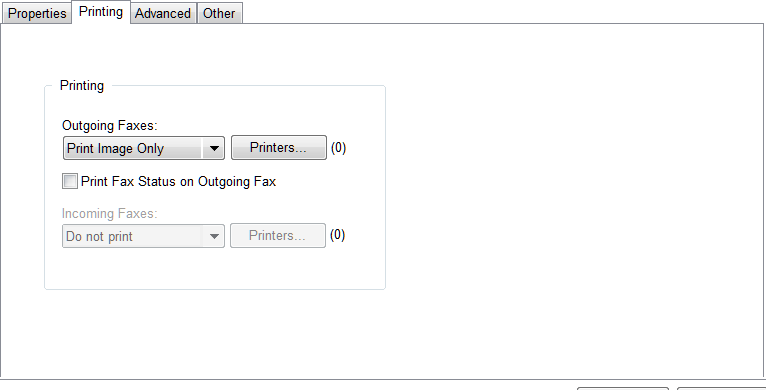
Printing Options
Printing options are controlled for each modem since you may want faxes on one phone line directed to certain printers. You can select print options for incoming and outgoing faxes, the options are:
•Do not print
•Print Image Only
•Print Confirmation Page Only
•Print Image and Confirmation
Select the desired option and click the Printers button to select the printer(s) to which you want the print job directed.
Advanced Tab Page
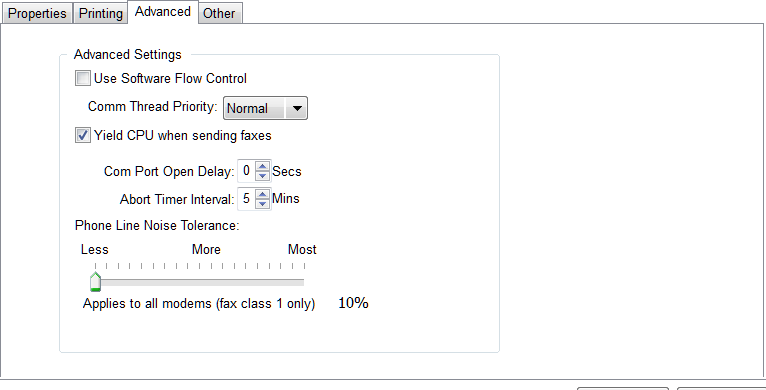
Under normal circumstances you should not need to change these options. It is recommended you not change the default options unless you are directed to do so by technical support.
Other Tab Page
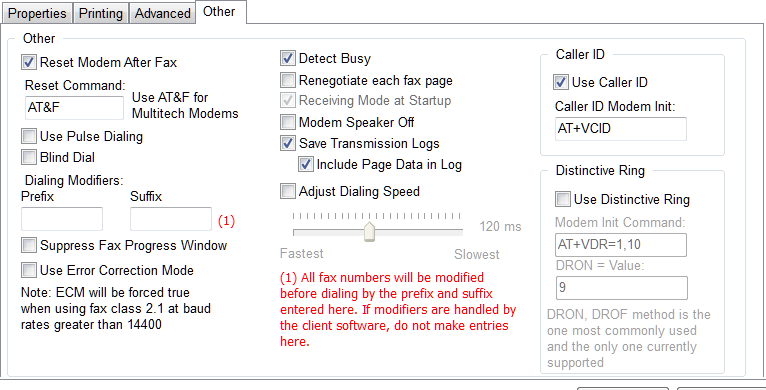
Reset Modem After Fax
You should always set this option, it is checked by default.
Reset Command
ATZ and AT&F are the most common modem reset commands. Use ATZ unless you are using a Multitech modem, in which case AT&F is recommended.
Use Pulse Dialing
Obsolete with modern phone systems. If you have are in a rural area with ancient phone technology check this option. This is intended for old style rotary dial phone lines.
Blind Dial
Checking this option will cause the modem to ignore the dial tone altogether. If this option is not checked and there is no dial tone on the line, the fax transmission will fail with 'No dial tone' error. This condition indicates a problem on the line, the phone system emits a dial tone when it is ready to accept the dialing of the fax number. If there is no dial tone then either the modem cannot detect it, there *really* is no dial tone, meaning the line is not properly connected to the modem or is connected to the wrong jack on the modem or the wall jack is not "live". Issues like this cannot be overcome by simply checking this option. If you have a modem that periodically does not detect the dial tone when you are certain the line is ok check this option, otherwise it is recommended that you leave this option unchecked as 'no dial tone' indicates a problem that needs to be addressed.
Dialing Modifiers
If you phone system requires dialing 9 to obtain an outside line (for example) enter a 9 in the prefix box followed by a comma like this : "9," (do not enter quotes). The comma causes the modem to wait for 2 seconds after dialing the 9, which should give the phone system plenty of time to engage and emit the dial tone. The suffix is available for more sophisticated phone systems that allow logging of some phone activity.
Suppress Fax Progress Window
Check this option to suppress the display of fax progress windows for this modem
Use Error Correction Mode
Error correction is never used unless you are using the SG3 edition of the fax server and have a class 2.1 modem and have selected class 2.1 for the fax class. Error correction is mandatory when using class 2.1 and will be forced.
Detect Busy
This option is checked by default and causes the modem to detect busy signals on the line. In cases where your modem is detecting busy under conditions where you are certain the line is not busy, you can uncheck this option.
Renegotiate each fax page
You should probably never check this option unless tech support has directed you to do so.
Receiving Mode at startup
For modems configured as receiving or both sending and receiving, check this option to have fax receive mode started for this modem when the fax server software is started. If for whatever reason you do not want receive modem at startup, uncheck this option.
Modem Speaker Off
Check this option to silence the modem speaker. If your modem has a speaker (mostly external modems only) the noise on the line is useful in troubleshooting failed sessions, so if you have problems with fax sessions, unchecking this option will assist in determining the cause of session failures.
Save Transmission Logs
Transmission logs are vital to diagnosing fax session failures, you should leave this item checked.
Include page data in log
Checking this option enables additional logging information in the transmission logs. This increases the size of the transmission logs and is sometimes needed to expose more detail for troubleshooting failed sessions.
Adjust dialing speed
Some modems may send the dialing command to the phone line at speeds that cannot be handled by the phone equipment. This is common on some PBX systems. Move the slider to the right to slow down the speed of dialing by the modem.
Caller ID
If you have caller id on your phone line, check use caller id. There are several types of caller id modem init commands AT+VCID and AT#CID are the most common. Consult your modem documentation and enter the appropriate command for your modem. AT+VCID is the default.
Distinctive Ring
Distinctive ring that is reported by the modem in DRON and DROFF messages is supported. If you have DR on your phone line, enter the modem init command to enable distinctive ring and the DRON value. The DRON value will differ from one phone provider to another and depend on whether the DR line has short rings or long rings. Your phone provider will likely NOT be able to tell you this information. The best way to determine what the value should be is to send a transmission log to snappy technical support. When receive modem is on, call the DR number on the modem line, let the call be terminated by the fax server and then send the transmission log. Note: you must check the 'Include page data in log' option (above) so that the log will contain all relevant information.
To access the transmission log, select the line item in the inbox, click the 'View transmission log' button on the toolbar above the inbox data view. You can save the log to a .txt file and send to snappy support. We will be able to give you the DRON value to be used.